Measured diagram
What treatment does each stage of tooth wear need?
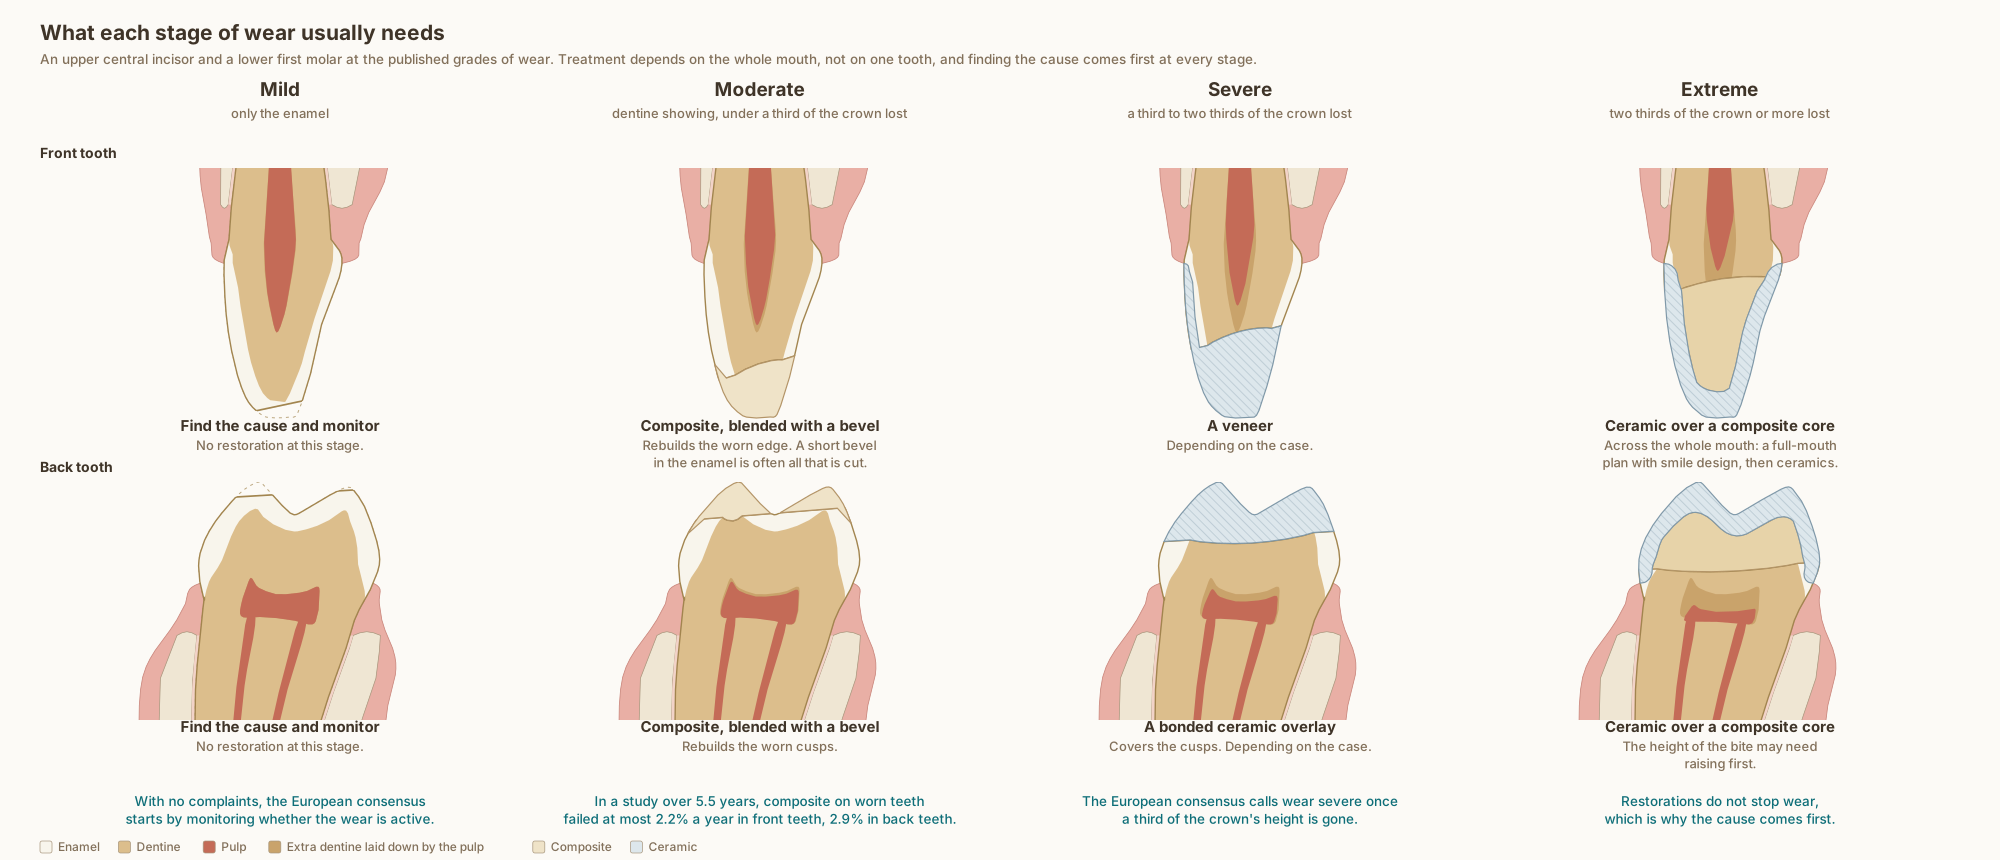
Four published grades of wear on an upper central incisor and a lower first molar, with the treatment each usually needs. Treatment depends on the whole mouth, and finding the cause comes first at every stage.
What the drawing is measured from
- The grades: the Tooth Wear Evaluation System 2.0 grades the biting surface of a tooth by wear within the enamel, dentine exposed with up to a third of the crown's height lost, a third to two thirds lost, and two thirds or more. It also lists the signs of mechanical and chemical wear. No grading scale has been validated against measured tissue loss on a single tooth, so these drawings illustrate grades and do not measure them. DOI 1
- European consensus on severe tooth wear: wear is severe once at least a third of the clinical crown has been lost; with no complaints, patients are monitored first; preparation is limited to what is necessary, such as seats, bevels or chamfers; and restorations change the rate, location and nature of wear rather than prevent it. DOI 2
- Direct composite for severe wear: 34 patients and 1,269 restorations followed for a mean of 62.4 months, with annual failure rates of at most 2.2% in front teeth and 2.9% in back teeth; molars needed the most maintenance. DOI 3
- The pulp: wear is usually slow and pulp death is rare, yet 11.6% of 448 patients referred for excessive wear had near or frank exposures or root canal treatment. No study gives, in millimetres, how far the human pulp draws back under wear, so the distance drawn is representative. DOI 4
- Woelfel's Dental Anatomy: wear facets on the incisal edges of upper incisors slope cervically toward the palate. No study gives a facet angle, so none is printed here.
- The teeth are the measured upper central incisor and lower first molar used in every figure on this site. How deep each worn surface, hollow and notch is drawn is representative, not a measurement of one patient.
Use this diagram
Free to use, including commercially, with credit.
This diagram is published under CC BY 4.0. You may reproduce it in articles, teaching material, presentations and patient information, print or online, without asking. The one condition is that you credit Dr. Khalid Aletaibi and link back to this page.
It is published this way on purpose. The measurement in this drawing is not something the people selling the treatment tend to publish, so it is more useful spread than kept.
Credit line
What each stage of wear usually needs. Dr. Khalid Aletaibi, CC BY 4.0. https://khalidaletaibi.com/en/diagrams/tooth-wear-stages
HTML embed
<figure>
  <img src="https://khalidaletaibi.com/figures/tooth-wear-stages-en.svg" alt="What each stage of wear usually needs" width="100%">
  <figcaption>
    What each stage of wear usually needs. <a href="https://khalidaletaibi.com/en/diagrams/tooth-wear-stages">Dr. Khalid Aletaibi</a>,
    <a href="https://creativecommons.org/licenses/by/4.0/">CC BY 4.0</a>
  </figcaption>
</figure>